 how-to
How to Build a Notion Dashboard Fast: 7 Steps
Table of Contents
- Start With Your Dashboard Purpose and Audience
- Set Up Your Workspace and Create a New Dashboard Page
- Build a Notion Dashboard Template That Fits Your Workflow
- Add Linked Database Views for Real-Time Updates
- Create Dynamic Notion Dashboard Sections With Task and Project Views
- Explore Notion Dashboard Ideas for Your Specific Needs
- Organize Navigation and Finalize Your Setup
- Frequently Asked Questions
Last Updated: October 15, 2026
Start With Your Dashboard Purpose and Audience
To build Notion dashboard fast, you need to know exactly what you're building before you start. Most people skip this step and end up redesigning halfway through. That costs hours.
Ask yourself three questions first:
- Who will use this dashboard? (Just you, your team, clients?)
- What decision or action does it support? (Track projects, manage clients, monitor health?)
- What data matters most? (Deadlines, budgets, status updates?)
Your answers shape everything that comes next. A personal productivity dashboard looks nothing like a team project tracker. A healthcare student's study dashboard differs completely from a freelancer's client management system.
TemplateForge provides pre-built Notion dashboards tailored to specific workflows. But even with a template, understanding your purpose first ensures you customize it correctly rather than forcing your work into someone else's structure.
Spend five minutes writing down your purpose. This single step cuts your total build time in half.
Set Up Your Workspace and Create a New Dashboard Page
Creating the page takes under a minute.
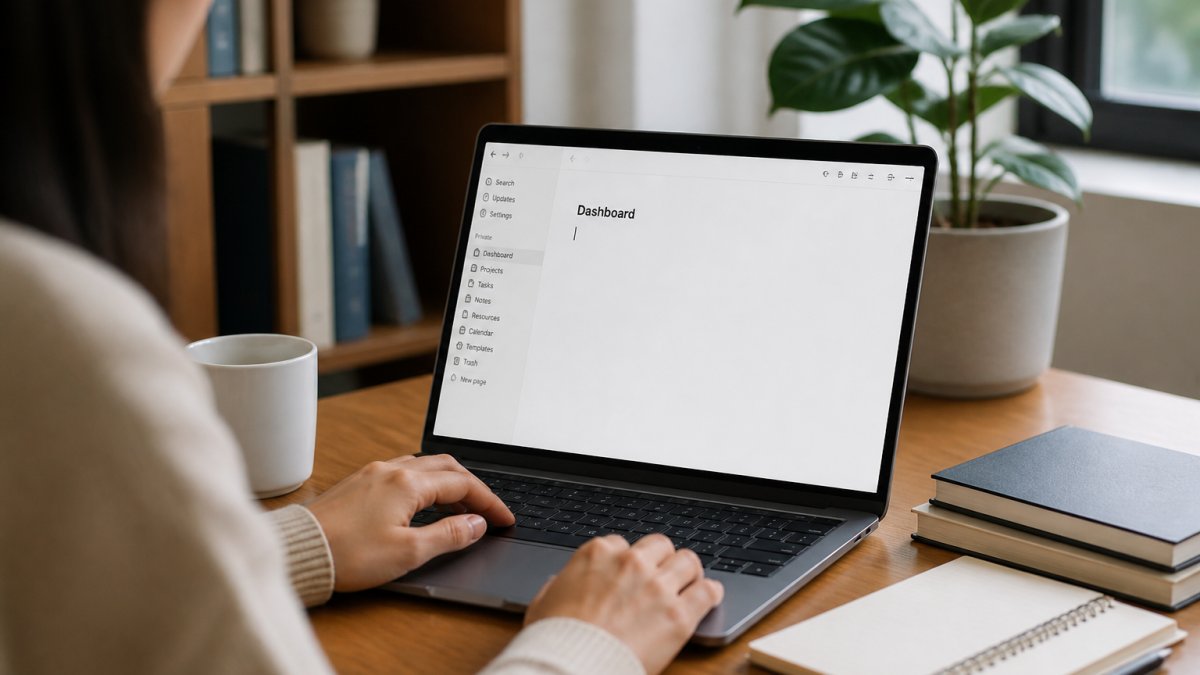
Minute 0-1: Create the page. In the sidebar, hover over your workspace name, click the + that appears, and choose Page. Name it "Dashboard." Press Enter. That is your front door.
Minute 1-3: Set the layout. Click the ⋯ menu at the top right of the page. Under Layout, switch to Full width.
Minute 3-5: Add three section headers. Type /h2 three times and label them: Now, This Week, Reference. These three zones are the entire skeleton of an MVD. Everything else is optional.
Minute 5-15: Fill the three zones with the lightest possible content.
- Under Now, type
/todoand add two or three items you are actively working on today. This is a plain checklist block, not a database. It costs nothing and gives you an immediate reason to open the page. - Under This Week, type
/linkedand link to a single existing database (tasks, projects, or whatever you already track). Apply one filter: Status is not Done. Sort by due date ascending. That is your whole weekly view. - Under Reference, paste two or three links to pages you open every day, your notes hub, your calendar page, your team wiki. Use
/linkand paste the URL, or type[[to link to an internal page.
At this point you have a functional dashboard. It is not pretty. It is not comprehensive. It works, and you built it in a quarter of an hour.
Why full width matters more than it sounds. Notion's standard layout caps content at roughly 900 pixels wide on a typical laptop screen.
What to skip on the first pass. Do not add a cover image, an icon, a two-column layout, or any embedded widget yet.
Build a Notion Dashboard Template That Fits Your Workflow
A template is just a starting structure. The real work is making it match how you actually work, not how you think you should work.
If you're building from scratch, start with these core sections:
- Quick capture area: A small text block or button-based section where you dump new ideas or tasks instantly.
- Active projects or priorities: Your current focus. This should be visible without scrolling.
- Upcoming deadlines: A sorted view of what's due soon.
- Progress tracking: A visual way to see what's moving forward.
- Reference area: Links, notes, or resources you access regularly.
Don't add all of these at once. Add the quick capture area first. Use it for a week. Then add the next section.
Many teams make the mistake of building the "perfect" dashboard upfront, then abandoning it because it doesn't match their actual workflow. Small, iterative additions work better than big upfront design.
TemplateForge's Notion dashboard templates come pre-structured with these sections already built. You're starting from a pattern that works, then customizing it for your specific needs.
The key difference between a template you'll use and one you'll abandon is simplicity. Can you explain what each section does in one sentence? If not, it's too complex.
Add Linked Database Views for Real-Time Updates
Linked databases are what transform a static page into a living dashboard. They pull information from your actual databases and update automatically.
Here's how they work: You create a database somewhere (tasks, projects, clients, whatever). Then you embed filtered views of that database on your dashboard page. When you update the original database, the dashboard updates instantly.
To add a linked database view:
- Click the plus icon on your dashboard page where you want the database to appear
- Select "Database" and choose "Link to a database"
- Pick the database you want to connect
- Choose a view (table, board, list, gallery, or calendar)
- Apply filters to show only what matters for this dashboard
For example: If you have a "Tasks" database, you might create three views on your dashboard:
- Overdue tasks (filtered by date)
- This week's priorities (filtered by date range)
- Tasks by project (grouped by project name)
Each view pulls live data. Complete a task in your main database, and it disappears from your dashboard automatically.
This is the feature that saves the most time. You update information once, in one place, and it appears everywhere it's needed.
Create Dynamic Notion Dashboard Sections With Task and Project Views
Task and project views are where your dashboard becomes actionable. These aren't just for looking at, they're for doing work.
A task view typically shows:
- Task name
- Due date
- Status (Not Started, In Progress, Done)
- Priority (High, Medium, Low)
- Assigned to (if it's a team dashboard)
A project view shows:
- Project name
- Overall progress
- Team members
- Next milestone
- Status
The difference between a good view and a slow one is filtering and sorting. Don't show everything. Show what matters right now.
For task views, sort by due date. For project views, sort by status (in progress first). Add filters to hide completed items so your dashboard stays focused on what's active.
Use board view for status-based work (columns: To Do, Doing, Done). Use list view for deadline-based work (sorted by date). Use table view when you need to see many properties at once.
The build notion dashboard fast approach here is: pick one view type, use it for everything, then add variety only if you find it slows you down. Consistency beats variety.
Explore Notion Dashboard Ideas for Your Specific Needs
Different workflows need different dashboards. A healthcare student preparing for NCLEX needs something completely different from a freelancer managing clients.
For students: Your dashboard should show study progress, upcoming exam dates, high-yield topics to review, and time spent studying. Embed a linked database of study materials and a calendar view of your study schedule.
For freelancers: Your dashboard should display active client projects, upcoming deadlines, invoiced vs. unpaid work, and time tracking. Link your client database and project database so you can see everything in one view.
For small business owners: Your dashboard should track revenue, expenses, inventory status, customer inquiries, and team tasks. Link your financial data, inventory database, and CRM.
For corporate professionals: Your dashboard should show current projects, team responsibilities, performance metrics, and professional development goals. Link your project management database and personal development tracker.
The common thread: Your dashboard should answer the question you ask most often. For students, it's "What should I study today?" For freelancers, it's "What's due this week?" For business owners, it's "How are we doing financially?"
Start there. Everything else is decoration.
Organize Navigation and Finalize Your Setup
Navigation is the difference between a dashboard you use daily and one you forget about.
Navigation basics (5 minutes). Pin the dashboard to the top of your sidebar: hover the page title in the sidebar, click ⋯, and choose Pin. Inside the page, use H2 headers to separate zones and leave one blank line between sections.
Performance trade-offs you should know before you scale. Linked database views are convenient, but each one runs a query against its source database every time the page loads. A dashboard with two or three linked views feels instant.
Embeds are the biggest performance cost. An embedded widget (a chart, a calendar, a third-party tool) loads an external iframe on every page visit. Two or three embeds are fine. A dashboard that is mostly embeds will feel sluggish and will break whenever the external service is down.
A lightweight maintenance routine. Dashboards decay. Tasks pile up in "In Progress," filters stop matching reality, and views accumulate. A five-minute weekly pass keeps it alive:
- Archive or delete any linked view you have not looked at in two weeks.
- Check that your "This Week" filter still matches how you actually tag dates.
- Clear completed items out of any plain checklist blocks.
- Re-pin the dashboard if it drifted down your sidebar.
Readability and accessibility. A few small choices make a dashboard usable for more people, including anyone using a keyboard or a screen reader:
- Use real H2 and H3 headings rather than bold text styled to look like a heading. Headings are navigable; bold paragraphs are not.
- Keep body text at default size. Shrinking text to fit more on screen is the most common readability mistake in dashboards.
- Give database views descriptive names ("Overdue tasks," not "View 1") so the purpose is clear without opening them.
- Avoid relying on color alone to signal status. Pair color with a text label or an icon.
- Test the page on a phone once. Notion reflows columns and tables on narrow screens, and a layout that looks fine on a laptop can become unreadable on mobile.
When to stop. Test the dashboard with real work for one week. Note which sections you never open and which question you keep answering by hand. Fix those two things, then stop. A dashboard that works is better than a perfect one you are never done building.
| Task | Time to Complete | Frequency |
|---|---|---|
| Define purpose and audience | 5 minutes | One-time |
| Create dashboard page and MVD skeleton | 15 minutes | One-time |
| Add linked database views | 10-15 minutes per view | One-time setup |
| Create task/project views | 5-10 minutes per view | One-time setup |
| Navigation, readability, and polish | 10 minutes | One-time |
| Weekly maintenance pass | 5 minutes | Weekly |
| Total build time | 45-60 minutes | One-time |
Frequently Asked Questions
How do you create a dashboard in Notion?
Start by opening your Notion workspace and creating a new page. Name it your dashboard title, then add a database as your foundation. Use linked databases to pull information from multiple sources into one view, and arrange them using table, board, or list layouts. Add filters and sorting to show only what matters. The key is choosing your data structure before you style it, which prevents rebuilding later.
Can you use a Notion dashboard template to build faster?
Yes. A well-designed Notion dashboard template eliminates much of the setup phase. Instead of deciding what properties to create, how to organize databases, and which views to add, you start with a working structure and customize it to your workflow. Templates save hours because the database relationships and view configurations are already tested. Many freelancers and small business owners use templates to launch client management or project tracking dashboards in minutes rather than days.
What should you include in a Notion dashboard?
Include only what you'll actually use. A typical dashboard contains a task list with deadlines and priorities, a project board showing progress, a quick-capture notes area, and linked databases pulling data from other pages. Add filters and sorting so you see today's priorities first. Avoid widget overload or decorative sections that slow down navigation. The best dashboards are simple, focused on your immediate workflow, and updated regularly.
How do you make a Notion dashboard dynamic?
Use linked databases and filters to create views that update automatically. When you add a task to a source database, it appears in your dashboard view without manual entry. Set up filters by date (show this week's tasks), status (show in-progress items), or priority (show high-priority first). Add sorting by deadline or creation date. This approach keeps your dashboard current without constant maintenance and gives you real-time visibility into your work.