 how-to
How to Customize Notion Workspace Quickly
Table of Contents
- Set Up Your Workspace Foundation in 5 Minutes
- Build a Homepage That Works as Your Central Hub
- Configure Your Sidebar for Quick Navigation
- How to Organize Notion Pages and Subpages
- Customize Templates and Add Blocks to Your Notion Dashboard
- Connect Related Pages and Set Permissions
- Common Mistakes to Avoid When Customizing Your Workspace
- Notion Dashboard Examples and Workspace Setup Inspiration
- Frequently Asked Questions
Last Updated: October 5, 2026
Set Up Your Workspace Foundation in 5 Minutes
Getting started to customize Notion workspace doesn't require hours of planning. The key is to customize Notion workspace basics first, then build from there. Start by creating a new workspace and choosing a name that matches your role or project.
Next, add a profile photo and set your workspace icon. These small touches make your space feel personal. Then create your first page by clicking the plus icon on the sidebar. Name it something clear like "Home" or "Dashboard."
The real speed comes from not overthinking it. Many teams waste time perfecting structure before they have any content. Instead, build a rough outline of what you need, then refine as you go. This approach saves hours of rework later.
Build a Homepage That Works as Your Central Hub
Your homepage is the entry point to everything. When you customize your Notion workspace, the homepage should show your most important information at a glance. This becomes your dashboard.
Start by adding a title block at the top. Then add a few key sections below it using toggle blocks or simple text headers. Common sections include:
- Today's priorities
- Active projects
- Quick links to important pages
- Recent updates
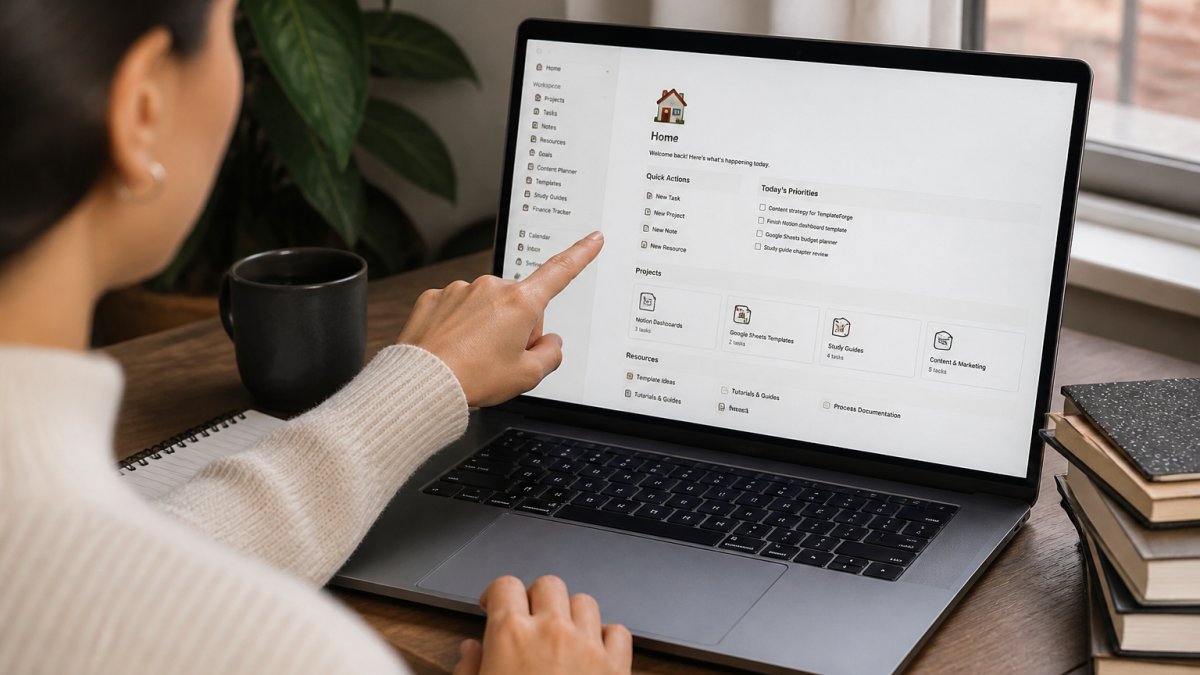
Use database views to pull live data into your homepage. For example, a "Tasks Due Today" view shows only items with today's date. This keeps your homepage current without manual updates. Add images or cover photos to make sections visually distinct.
The best homepages balance information with simplicity. Too many widgets create clutter. Aim for three to five key sections that answer: What do I need to do right now? What projects are active? Where do I find what I need?
Configure Your Sidebar for Quick Navigation
The sidebar is your navigation hub, and it is the single fastest place to gain speed. When you customize a Notion workspace, sidebar organization directly impacts how fast you can find things. A messy sidebar wastes time every single day. The good news: a full sidebar cleanup takes about 3 minutes.
Here is the click-by-click sequence on desktop:
- Hover over any page in the left sidebar and click the ⋮⋮ (six-dot) handle to drag it up or down.
- Drag a page onto another page and release to nest it as a subpage.
- Hover over a page and click the star icon to add it to Favorites, which pins it to the very top of the sidebar.
- Click the + next to Private or a teamspace name to create a new top-level page.
- Right-click a page and choose Move to to relocate it without dragging.
- Click your workspace name at the top left, then Settings, to rename the workspace or change its icon.
Organize by frequency of use, not by category:
- Favorites (top): your three to five most-visited pages
- Working set (middle): active projects and daily pages
- Reference (collapsed): archived work, templates, and old notes Maintaining this hierarchy ensures that your workspace remains functional as you personalize daily planners to better align with your evolving workflow.
Rename pages with clear, scannable titles. Avoid vague names like "Notes" or "Ideas." Instead, use "2026 Content Calendar" or "Client Feedback Log." Specific names save mental effort when scanning.
Desktop vs. mobile. The sidebar behaves differently by device, and knowing the difference saves frustration:
- Desktop: full drag-and-drop, right-click menus, Favorites starring, and teamspace creation all work as described above.
- Mobile: the sidebar is hidden behind the ☰ menu in the top-left corner. You can still tap the star to favorite a page, but drag-to-nest is unreliable. Do your structural work on desktop, then verify on mobile that your top pages are reachable in two taps or fewer.
A quick test: open Notion on your phone, tap the menu, and count how many taps it takes to reach your most-used page. If it is more than two, go back to desktop and star that page so it sits in Favorites.
How to Organize Notion Pages and Subpages
Page hierarchy matters, but the keyword is speed, so treat this as a 5-minute structural pass, not a redesign. When you customize a Notion workspace, clear organization prevents chaos as you add more content.
Here is the click-by-click sequence on desktop:
- In the sidebar, click + New page (or the + next to a section).
- Type a name, then press Enter.
- To nest a page, open the parent page, type /page, and press Enter to create a subpage inline.
- To move an existing page, drag it in the sidebar and drop it onto the parent page.
- To reorder siblings, drag the ⋮⋮ handle up or down.
- To turn a block into a page, hover the block, click the ⋮⋮ handle, and choose Turn into → Page.
Naming conventions help scanning. Use consistent prefixes for different page types:
- [ACTIVE] Project Name
- [ARCHIVED] Project Name
- [TEMPLATE] Page Name
- [REFERENCE] Page Name
These prefixes make scanning faster and help you spot what type of page you are looking at instantly. They also make sorting easier if you ever export your workspace.
Limit nesting depth to three levels. Going deeper creates confusing navigation. Most users find pages faster when they are no more than two clicks away from the sidebar.
A minimal setup for different use cases. Instead of copying one system, pick the starting shape that matches you and build only that:
- Students: one top-level page per course, with subpages for Syllabus, Assignments, and Notes. Add a single "Due This Week" database view on your homepage.
- Personal planning: one top-level page called "Life" with subpages for Health, Finance, and Projects. Keep it to three subpages until you feel real pain.
- Small teams: one teamspace, one top-level page per active project, and a shared "Team Home" page with links. Skip personal subpages entirely.
Desktop vs. mobile. Structural work belongs on desktop. On mobile, you can create pages and subpages from the ☰ menu, but drag-to-nest is unreliable and inline /page creation is slower. Build on desktop, then check on mobile that your top three pages are reachable in two taps.
A simple test for whether a page belongs: can you name the one thing you will put on it right now? If not, do not create it yet.
Customize Templates and Add Blocks to Your Notion Dashboard
Templates save time by eliminating repetitive setup. When you customize a Notion workspace, templates become your productivity multiplier. Create a template for any page type you use repeatedly.
For example, create a project template with sections for goals, timeline, team members, and status. Then duplicate it each time you start a new project. The template ensures consistency and eliminates the "what should I include?" question.
Blocks are the building units of your pages. Common useful blocks include:
- Text and headings for structure
- Database views for live data
- Toggle blocks to hide details
- Embed blocks for external content
- Callout blocks to highlight important info
Don't use every block type. Stick with five to seven that match your workflow. Too many block types create visual chaos and confusion.
Create a "Block Reference" page that shows examples of each block you use. Link to it when teaching others how to use your workspace. This becomes your internal documentation.
Connect Related Pages and Set Permissions
Connections between pages create a knowledge system. When you customize a Notion workspace, linking pages helps you find related information quickly. Use relation properties and rollup functions to connect databases.
For example, link your "Clients" database to your "Projects" database. Then each project page automatically shows which client it belongs to. This creates a living knowledge system that stays current without manual updates.
Set permissions based on access needs. Notion offers four permission levels:
- Full access: edit everything
- Edit access: modify content but not structure
- Comment access: add feedback only
- Read-only: view only
Start restrictive. Give people the minimum access they need. You can always expand access later. This protects your workspace structure from accidental changes.
Share specific pages with people who need them, not entire workspaces. This keeps sensitive information private while letting others access what they need.
Common Mistakes to Avoid When Customizing Your Workspace
The biggest mistake is over-customizing before you have real content. Teams often spend weeks perfecting structure, then abandon the system because it doesn't match their actual workflow.
Another common error is creating too many databases. Each database adds complexity. Start with three to five core databases.
Don't use fancy formatting as a substitute for clear organization. A plain, well-organized workspace beats a beautiful but confusing one.
Avoid deep nesting. Pages buried five levels down get forgotten. Keep your hierarchy shallow and your most-used pages visible.
Don't skip documentation. Write one-page guides for each major section. Explain what each database does and how to use it. This helps you remember your own system and lets others contribute.
Many teams create templates but never update them. Templates become outdated fast. Review them quarterly and refresh examples to match current reality.
Notion Dashboard Examples and Workspace Setup Inspiration
Real examples beat theory. A student might build a dashboard with sections for each class, assignment deadlines, and study notes.
A small business owner could create sections for team tasks, client communication, and financial tracking. A researcher might organize by project, with subpages for literature notes, experiments, and findings.
The structure matters less than whether it matches your actual needs. Look at how you currently work. What tools do you use daily?
Visit public Notion templates to see what others have built. Read through a few examples, but don't copy them directly. Instead, extract ideas that fit your workflow and adapt them.
The best workspaces evolve. Start simple, use it for two weeks, then adjust based on what you learn.
Building a customized Notion workspace doesn't require technical skills or hours of setup. The key is starting simple and improving as you go.
Frequently Asked Questions
How do I customize my Notion workspace quickly without spending hours?
Start by setting up your homepage first, then configure your sidebar for navigation. Add only the blocks and pages you actually need, resist the urge to build everything at once. Most users can customize a functional workspace in 20-30 minutes by focusing on these three elements before adding templates or connecting pages. Skip customization features you won't use.
What should I customize first in a Notion workspace?
Begin with your sidebar and homepage. The sidebar determines how quickly you can navigate to your most-used pages, while a solid homepage acts as your central hub. Once these two are in place, you have a functional workspace. Then add task management or database views if needed. This order prevents you from building unnecessary complexity early on.
Are Notion templates easy to customize, and can I use them without building from scratch?
Yes, templates eliminate the need to build systems from scratch. Most templates come pre-built with pages, blocks, and database views already in place. You simply replace placeholder content with your own data, adjust the sidebar to match your workflow, and modify permissions if you're sharing with a team. This approach saves hours compared to starting with a blank workspace.
How do I make my Notion workspace easier to navigate?
Use your sidebar strategically by pinning your five most-used pages at the top. Create a clear homepage with linked shortcuts to key sections. Use descriptive page names and organize subpages under parent pages to reduce clutter. Connect related pages using database relations so information flows naturally. Test navigation by asking: can I reach my most-used tools in two clicks or fewer?